> ## Documentation Index
> Fetch the complete documentation index at: https://wb-21fd5541-update-reference-docs-40.mintlify.site/llms.txt
> Use this file to discover all available pages before exploring further.

# Slack アラートを設定する

> W&B Server のアラート、通知、モニタリングの更新情報を受信するための Slack アプリケーションを作成して設定します。

W\&B Server を [Slack](https://slack.com/) と統合して、チームがすでに使用している Slack Workspace に、W\&B インスタンスからアラートや通知を送信できるようにします。このページでは、W\&B Server 管理者向けに、Slack アプリケーションの作成、OAuth スコープとリダイレクト URL の設定、さらにそのアプリケーションを W\&B に登録する方法を説明します。

<Note>
  [W\&B Dedicated Cloud デプロイで Slack アラートを設定する手順を紹介する動画](https://www.youtube.com/watch?v=JmvKb-7u-oU) (6 分) をご覧ください。
</Note>

<div id="create-the-slack-application">
  ## Slack アプリケーションを作成する
</div>

W\&B Server は、アラート配信のブリッジとして カスタム Slack アプリケーションを使用します。通知を受け取りたい Slack Workspace でそのアプリケーションを作成するには、以下の手順に従ってください。

1. [https://api.slack.com/apps](https://api.slack.com/apps) にアクセスし、**Create an App** を選択します。

   <Frame>
     <img src="https://mintcdn.com/wb-21fd5541-update-reference-docs-40/qxkRO78_ZFVjk-5I/images/hosting/create_an_app.png?fit=max&auto=format&n=qxkRO78_ZFVjk-5I&q=85&s=d3f02c0ba349b34470152455c79d71aa" alt="「Create an App」ボタン" width="1442" height="686" data-path="images/hosting/create_an_app.png" />
   </Frame>

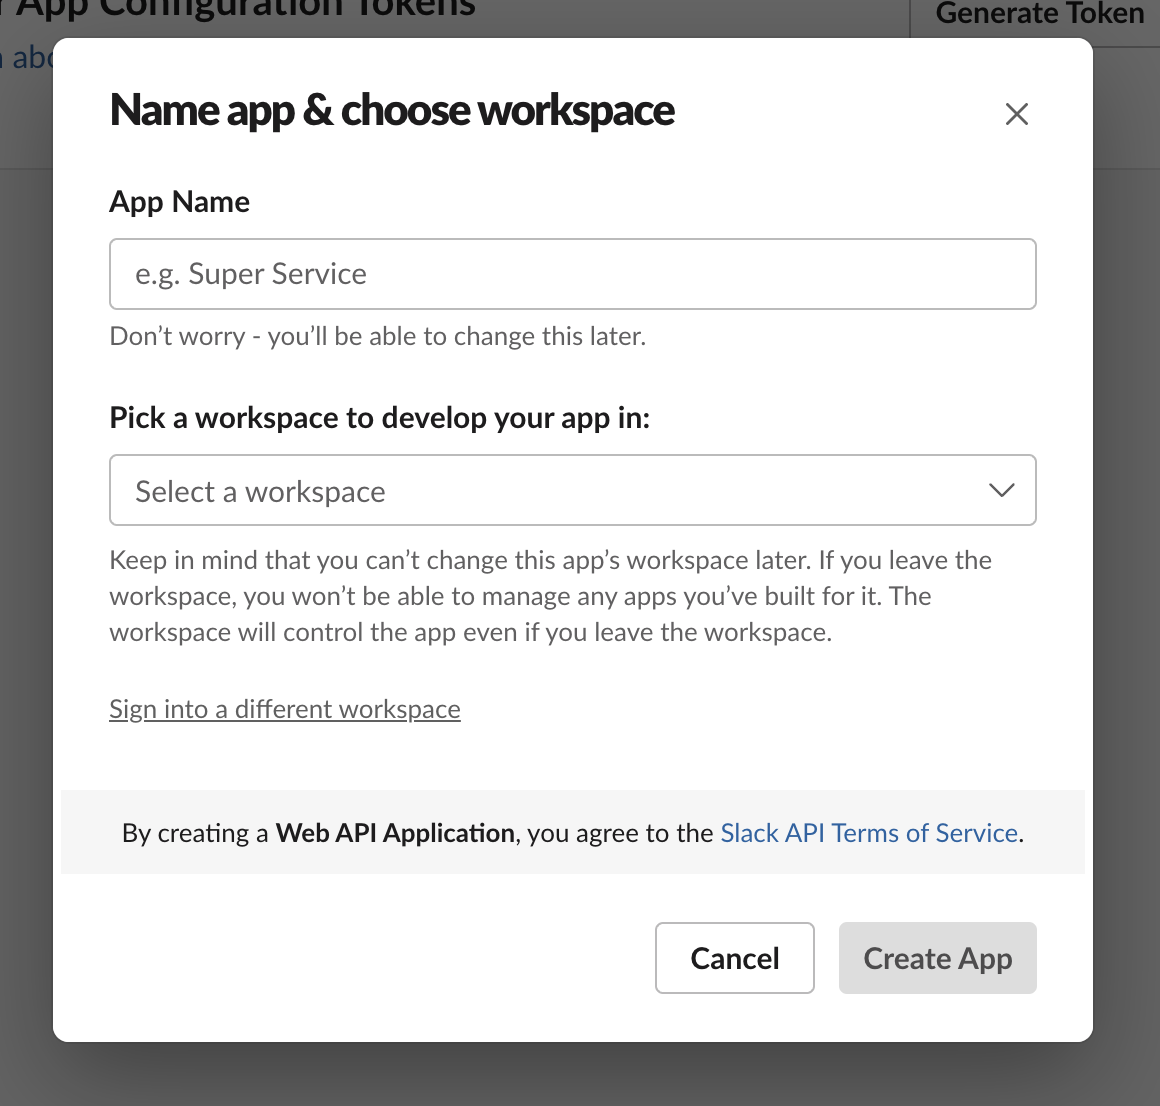
2. **App Name** フィールドにアプリ名を入力します。

3. アプリを開発する Slack Workspace を選択します。ここで使用する Slack Workspace は、アラートに使用する予定の Workspace と同じものにしてください。

   <Frame>
     <img src="https://mintcdn.com/wb-21fd5541-update-reference-docs-40/qxkRO78_ZFVjk-5I/images/hosting/name_app_workspace.png?fit=max&auto=format&n=qxkRO78_ZFVjk-5I&q=85&s=07eb2a0b2ac726880420ef06831b4fad" alt="アプリ名とWorkspaceの選択" width="1160" height="1106" data-path="images/hosting/name_app_workspace.png" />
   </Frame>

<div id="configure-the-slack-application">
  ## Slack アプリケーションを設定する
</div>

Slack アプリケーションを作成したら、メッセージを投稿し、OAuth ハンドシェイク中の W\&B からのリダイレクトを受け取れるように、必要な権限を付与します。

1. 左サイドバーで **OAuth & Permissions** を選択します。

   <Frame>
     <img src="https://mintcdn.com/wb-21fd5541-update-reference-docs-40/qxkRO78_ZFVjk-5I/images/hosting/add_an_oath.png?fit=max&auto=format&n=qxkRO78_ZFVjk-5I&q=85&s=d931daaba67d0d99419074388364937c" alt="OAuth & Permissions メニュー" width="218" height="324" data-path="images/hosting/add_an_oath.png" />
   </Frame>

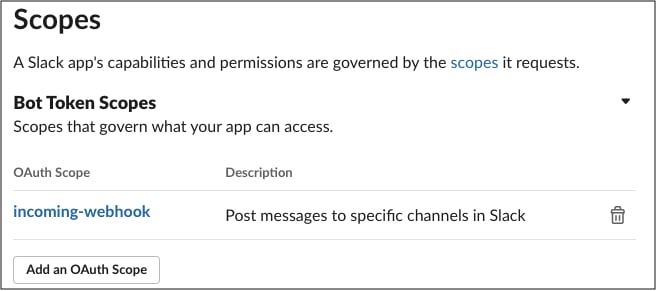
2. **Scopes** セクションで、ボットに `incoming_webhook` スコープを付与します。スコープを付与すると、アプリケーションが開発 Workspace でアクションを実行できるようになります。

   ボットの OAuth スコープの詳細については、Slack API ドキュメントの [Understanding OAuth scopes for bots](https://api.slack.com/legacy/oauth-scopes) を参照してください。

   <Frame>
     <img src="https://mintcdn.com/wb-21fd5541-update-reference-docs-40/qxkRO78_ZFVjk-5I/images/hosting/save_urls.png?fit=max&auto=format&n=qxkRO78_ZFVjk-5I&q=85&s=6f30d33fa9ff516b7e503f44f2b30082" alt="ボット token スコープ" width="656" height="291" data-path="images/hosting/save_urls.png" />
   </Frame>

3. **リダイレクト URL** が W\&B のインストール先を指すように設定します。ローカルシステム設定でホスト URL として設定したものと同じ URL を使用します。インスタンスに異なる DNS マッピングがある場合は、複数の URL を指定できます。

   <Frame>
     <img src="https://mintcdn.com/wb-21fd5541-update-reference-docs-40/qxkRO78_ZFVjk-5I/images/hosting/redirect_urls.png?fit=max&auto=format&n=qxkRO78_ZFVjk-5I&q=85&s=293cf576df1012379b71a9f0f1a1d962" alt="リダイレクト URL の設定" width="650" height="321" data-path="images/hosting/redirect_urls.png" />
   </Frame>

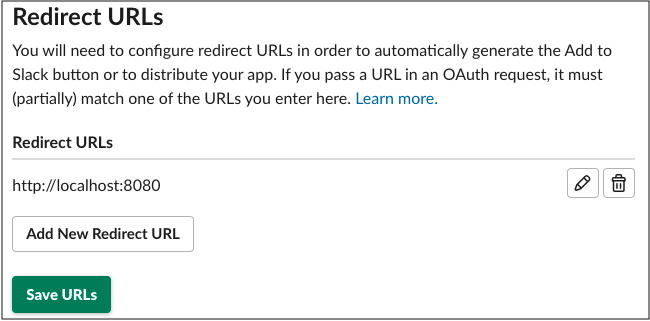
4. **Save URLs** を選択します。

5. 任意: **Restrict API Token Usage** で、W\&B インスタンス用の許可リストに追加する IP または IP 範囲を指定します。許可する IP アドレスを制限することで、Slack アプリケーションのセキュリティ向上に役立ちます。

<div id="register-your-slack-application-with-wb">
  ## Slack アプリケーションを W\&B に登録する
</div>

設定した Slack アプリケーションを W\&B インスタンスに登録すると、W\&B からそのアプリケーションを使用してアラートを送信できるようになります。

1. デプロイ環境に応じて、W\&B インスタンスの **System Settings** または **System Console** ページにアクセスします。

2. 表示している System ページに応じて、次のいずれかの手順に従います。

   * **System Console** の場合: **Settings** に移動し、**Notifications** を開きます。

     <Frame>
       <img src="https://mintcdn.com/wb-21fd5541-update-reference-docs-40/qxkRO78_ZFVjk-5I/images/hosting/register_slack_app_console.png?fit=max&auto=format&n=qxkRO78_ZFVjk-5I&q=85&s=71849e0887bdaa61687391f13acd20b7" alt="System Console notifications" width="1134" height="477" data-path="images/hosting/register_slack_app_console.png" />
     </Frame>

   * **System Settings** の場合: **Enable a custom Slack application to dispatch alerts** をオンにして、カスタム Slack アプリケーションを有効にします。

     <Frame>
       <img src="https://mintcdn.com/wb-21fd5541-update-reference-docs-40/qxkRO78_ZFVjk-5I/images/hosting/register_slack_app.png?fit=max&auto=format&n=qxkRO78_ZFVjk-5I&q=85&s=4b6b52947980a0fdcf4cc9e7f52def4f" alt="Enable Slack application toggle" width="667" height="187" data-path="images/hosting/register_slack_app.png" />
     </Frame>

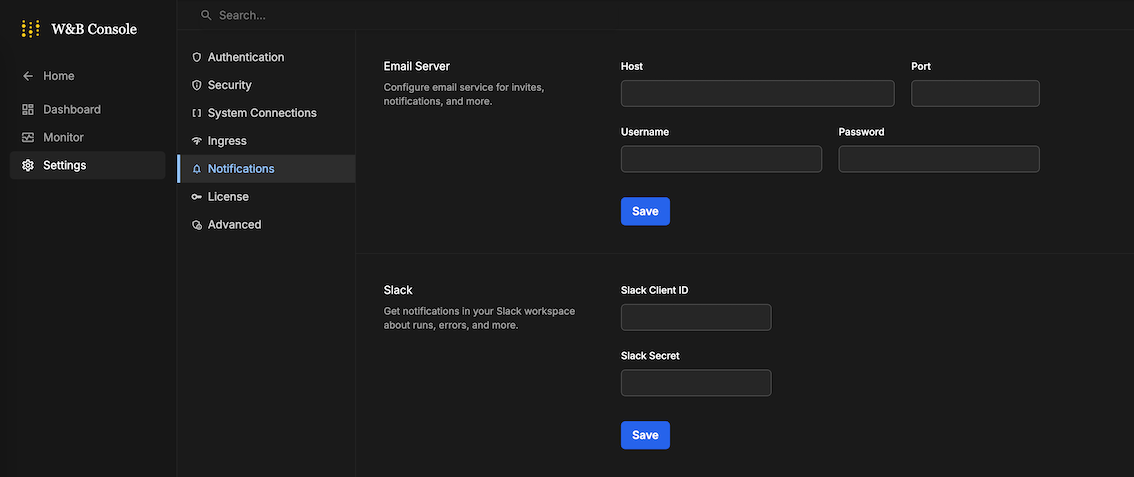
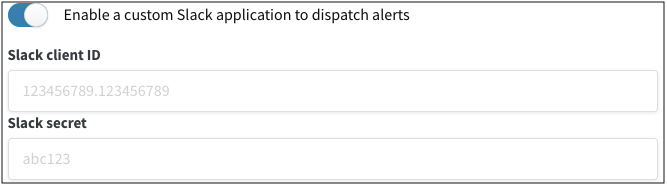
3. **Slack client ID** と **Slack secret** を入力し、**Save** を選択します。アプリケーションの client ID と secret は、**Settings** の **Basic Information** で確認できます。

4. 正しく動作することを確認するには、W\&B App で Slack インテグレーションを設定します。

これで、W\&B Server が Slack アプリケーションに登録され、設定した Slack workspace にアラートを送信できるようになります。
